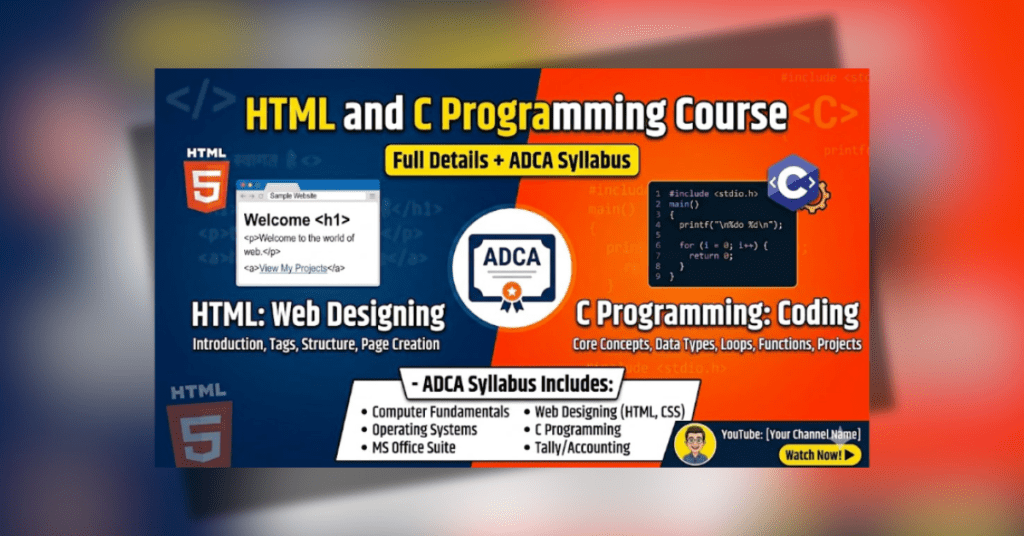
HTML और C Programming Course Full Details | ADCA Syllabus Hindi
March 27, 2026 2026-04-09 6:06HTML और C Programming Course Full Details | ADCA Syllabus Hindi
HTML और C Programming सीखें आसान हिंदी में। ADCA course में HTML elements, forms, tables और C programming basics जैसे data types, loops, array, pointer आदि सीखें।
HTML क्या है और इसके सभी Tags की पूरी जानकारी (List के साथ)
HTML क्या है?
HTML (HyperText Markup Language) एक मार्कअप लैंग्वेज है जिसका उपयोग वेब पेज बनाने के लिए किया जाता है। यह वेबसाइट का स्ट्रक्चर तैयार करती है, जैसे हेडिंग, पैराग्राफ, इमेज, लिंक आदि।
आसान शब्दों में:
HTML वेबसाइट का ढांचा (Structure) होता है।
HTML Tags क्या होते हैं?
HTML में Tags ऐसे कीवर्ड होते हैं जो बताते हैं कि कंटेंट को कैसे दिखाना है।
Tags हमेशा < > के अंदर लिखे जाते हैं।
उदाहरण:
<p>This is a paragraph</p>
HTML Tags की लिस्ट (नाम के साथ)
Basic Tags
1. <html> – पूरा HTML डॉक्यूमेंट
यह टैग पूरे HTML पेज का मुख्य कंटेनर (root element) होता है।
👉 मतलब:
- इसके अंदर पूरा वेबपेज लिखा जाता है
- यह बताता है कि यह एक HTML डॉक्यूमेंट है
📌 Example:
<html>
  <!-- पूरा कोड यहां आता है -->
</html>
2. <head> – हेड सेक्शन
यह टैग पेज की information (जानकारी) के लिए होता है, जो सीधे स्क्रीन पर नहीं दिखती।
👉 इसमें क्या आता है?
- पेज का टाइटल
- CSS (design)
- meta tags (SEO, charset आदि)
📌 Example:
<head>
  <title>My Website</title>
</head>
3. <title> – पेज का टाइटल
यह टैग ब्राउज़र के ऊपर (tab में) दिखने वाला नाम (title) सेट करता है।
👉 मतलब:
- जो नाम आप Chrome tab में देखते हैं वही
<title>से आता है
📌 Example:
<title>UICT Computer Institute</title>4. <body> – मुख्य कंटेंट
यह सबसे महत्वपूर्ण टैग है क्योंकि इसमें जो कुछ यूज़र को दिखाना है वो सब आता है।
👉 इसमें क्या लिखते हैं?
- Text
- Images
- Buttons
- Videos
- Links
📌 Example:
<body>
  <h1>Welcome to UICT</h1>
  <p>यह मेरा पहला वेबपेज है</p>
</body>
पूरा HTML स्ट्रक्चर (Complete Example Assignment)
<html>
  <head>
    <title>My First Page</title>
  </head>

  <body>
    <h1>Hello World</h1>
    <p>यह मेरा पहला HTML पेज है</p>
  </body>
</html>
Text Formatting Tags
Text Formatting Tags (टेक्स्ट को सजाने के टैग)
🔹 1. <h1> to <h6> – हेडिंग
यह टैग Heading (शीर्षक) बनाने के लिए होता है।
👉 खास बात:
<h1>सबसे बड़ा<h6>सबसे छोटा
📌 Example:
<h1>Main Heading</h1>
<h3>Sub Heading</h3>
2. <p> – पैराग्राफ
यह टैग Paragraph (अनुच्छेद) लिखने के लिए होता है।
📌 Example:
<p>यह एक पैराग्राफ है</p>3. <b> – Bold Text
यह टेक्स्ट को मोटा (Bold) बनाता है।
📌 Example:
<b>यह bold टेक्स्ट है</b>4. <i> – Italic Text
यह टेक्स्ट को Italic (तिरछा) बनाता है।
📌 Example:
<i>यह italic टेक्स्ट है</i>5. <u> – Underline
यह टेक्स्ट के नीचे लाइन (Underline) लगाता है।
📌 Example:
<u>यह underline टेक्स्ट है</u>6. <strong> – Important Text
यह भी टेक्स्ट को bold करता है, लेकिन यह important (महत्वपूर्ण) बताने के लिए होता है (SEO के लिए भी अच्छा)।
📌 Example:
<strong>यह महत्वपूर्ण टेक्स्ट है</strong>7. <em> – Emphasized Text
यह टेक्स्ट को जोर देकर (emphasis) दिखाता है (italic जैसा दिखता है)।
📌 Example:
<em>इस पर ध्यान दें</em>Link & Media Tags
1. <a> – Link (हाइपरलिंक)
यह किसी दूसरे पेज या वेबसाइट पर जाने के लिए होता है।
📌 Example:
<a href="https://www.uict.in">Visit UICT</a>👉 href = लिंक का address
2. <img> – Image (इमेज)
यह वेबसाइट पर image दिखाने के लिए होता है।
📌 Example:
<img src="image.jpg" alt="My Image">
src= image का pathalt= image का नाम/description
3. <audio> – Audio (आवाज़)
यह वेबसाइट पर audio चलाने के लिए होता है।
📌 Example:
<audio controls>
  <source src="song.mp3" type="audio/mp3">
</audio>
👉 controls = play/pause बटन दिखाने के लिए
4. <video> – Video
यह वेबसाइट पर video दिखाने के लिए होता है।
📌 Example:
<video controls width="300">
  <source src="video.mp4" type="video/mp4">
</video>
List Tags (सूची बनाने के टैग)
HTML में List का मतलब होता है items की सूची (list) बनाना, जैसे:
- नाम की list
- सामान की list
- नंबर वाली list
1. <ul> – Unordered List
यह बिना नंबर वाली list बनाने के लिए होता है।
👉 इसमें items के आगे bullet (•) आते हैं
📌 Example:
<ul>
  <li>Apple</li>
  <li>Banana</li>
  <li>Mango</li>
</ul>
👉 Output:
- Apple
- Banana
- Mango
2. <ol> – Ordered List
यह नंबर वाली list बनाने के लिए होता है।
👉 इसमें items के आगे 1, 2, 3… आते हैं
📌 Example:
<ol>
  <li>HTML</li>
  <li>CSS</li>
  <li>JavaScript</li>
</ol>
👉 Output:
- HTML
- CSS
- JavaScript
3. <li> – List Item
यह हर list के item (एक-एक point) को define करता है।
👉 ध्यान दें:
<li>हमेशा<ul>या<ol>के अंदर ही लिखा जाता है
📌 Example:
<ul>
  <li>Tea</li>
  <li>Coffee</li>
</ul>
पूरा Example (Mix List)
<h3>My Daily Routine</h3>

<ol>
  <li>Wake up</li>
  <li>Study</li>
  <li>Practice Coding</li>
</ol>

<ul>
  <li>Milk</li>
  <li>Bread</li>
  <li>Eggs</li>
</ul>
आसान भाषा में समझें
<ul>= बिना नंबर की list<ol>= नंबर वाली list<li>= list का एक item
Table Tags
Table Tags (टेबल बनाने के टैग)
HTML में Table का उपयोग डेटा को rows (पंक्ति) और columns (स्तंभ) में दिखाने के लिए किया जाता है।
👉 जैसे:
- Students marks
- Fees details
- Course list
1. <table> – टेबल
यह पूरा टेबल बनाने का मुख्य टैग होता है।
👉 इसके अंदर पूरा table structure आता है
📌 Example:
<table>
  <!-- पूरा table यहां बनेगा -->
</table>
2. <tr> – Table Row (पंक्ति)
यह table की एक row (लाइन) बनाता है।
📌 Example:
<tr>
  <!-- एक row का data -->
</tr>
3. <td> – Table Data
यह table का सामान्य data (cell) होता है।
📌 Example:
<td>Rohan</td>
<td>90</td>
4. <th> – Table Heading
यह table का heading (शीर्षक) होता है।
👉 यह text थोड़ा bold और center में दिखता है
📌 Example:
<th>Name</th>
<th>Marks</th>
पूरा Table Example (बहुत Important)
<table border="1">
  <tr>
    <th>Name</th>
    <th>Marks</th>
  </tr>

  <tr>
    <td>Rohan</td>
    <td>90</td>
  </tr>

  <tr>
    <td>Sohan</td>
    <td>85</td>
  </tr>
</table>
Form Tags (फॉर्म बनाने के टैग)
HTML में Form का उपयोग यूज़र से जानकारी (input) लेने के लिए किया जाता है।
👉 जैसे:
- Registration Form
- Login Form
- Contact Form
1. <form> – फॉर्म
यह पूरा फॉर्म बनाने का main टैग होता है।
👉 इसके अंदर सारे input fields आते हैं
📌 Example:
<form>
  <!-- पूरा form यहाँ बनेगा -->
</form>
2. <input> – इनपुट फील्ड
यह यूज़र से data लेने के लिए होता है।
👉 इसके कई types होते हैं:
- text (नाम)
- password
- number
📌 Example:
<input type="text" placeholder="Enter your name">
3. <textarea> – टेक्स्ट बॉक्स
यह बड़ा input box होता है (message या address के लिए)
📌 Example:
<textarea placeholder="Enter your message"></textarea>
4. <button> – बटन
यह button बनाने के लिए होता है।
👉 जैसे:
- Submit
- Reset
📌 Example:
<button>Submit</button>
5. <label> – लेबल
यह input field के आगे नाम (label) दिखाने के लिए होता है।
👉 इससे form समझने में आसान होता है
📌 Example:
<label>Name:</label>
<input type="text">
पूरा Form Example (बहुत Important)
<form>
  <label>Name:</label><br>
  <input type="text" placeholder="Enter your name"><br><br>

  <label>Password:</label><br>
  <input type="password" placeholder="Enter password"><br><br>

  <label>Message:</label><br>
  <textarea></textarea><br><br>

  <button>Submit</button>
</form>
Layout / Structure Tags (HTML5)
ये tags वेबसाइट का structure (ढांचा) बनाने के लिए उपयोग होते हैं।
👉 इससे वेबसाइट साफ, समझने में आसान और SEO-friendly बनती है।
1. <header> – हेडर
यह वेबसाइट का ऊपरी भाग (top section) होता है।
👉 इसमें क्या आता है?
- Website का नाम (logo)
- Title
- Menu
📌 Example:
<header>
  <h1>UICT Computer Institute</h1>
</header>
2. <nav> – Navigation
यह menu (navigation bar) बनाने के लिए होता है।
👉 इसमें links होते हैं:
- Home
- About
- Contact
📌 Example:
<nav>
  <a href="#">Home</a>
  <a href="#">Courses</a>
  <a href="#">Contact</a>
</nav>
3. <section> – सेक्शन
यह webpage को अलग-अलग भागों में बांटने के लिए होता है।
📌 Example:
<section>
  <h2>Our Courses</h2>
  <p>ADCA, DCA, Tally</p>
</section>
4. <article> – आर्टिकल
यह independent content (जैसे blog, news, post) के लिए होता है।
📌 Example:
<article>
  <h2>HTML Course</h2>
  <p>Learn HTML from basic to advanced</p>
</article>
5. <footer> – फुटर
यह वेबसाइट का नीचे का भाग (bottom section) होता है।
👉 इसमें क्या आता है?
- Contact details
- Copyright
- Links
📌 Example:
<footer>
  <p>© 2026 UICT | All Rights Reserved</p>
</footer>
पूरा Layout Example (बहुत Important)
<header>
  <h1>UICT Institute</h1>
</header><nav>
  <a href="#">Home</a>
  <a href="#">Courses</a>
</nav><section>
  <h2>Welcome</h2>
  <p>This is our website</p>
</section><article>
  <h2>New Course</h2>
  <p>ADCA Admission Open</p>
</article><footer>
  <p>Contact: www.uict.in</p>
</footer>
Important Points (Exam के लिए)
<header>= ऊपर का हिस्सा<nav>= menu<section>= अलग भाग<article>= content/post<footer>= नीचे का हिस्सा
आसान भाषा में समझें
👉 Website = एक घर जैसा है
- Header = घर का नाम
- Nav = रास्ता (menu)
- Section = कमरे
- Article = जानकारी
- Footer = नीचे की जानकारी
1. Colors in HTML (कलर का उपयोग)
HTML में colors का उपयोग text, background, border आदि को रंग देने के लिए किया जाता है।
👉 Colors देने के 3 तरीके होते हैं:
1. Color Name से
👉 सीधे color का नाम लिख सकते हैं
📌 Example:
<p style="color:red;">यह लाल रंग का टेक्स्ट है</p>
2. HEX Code से
👉 यह थोड़ा advance होता है (जैसे: #ff0000)
📌 Example:
<p style="color:#00ff00;">यह हरा रंग है</p>
3. RGB से
👉 Red, Green, Blue के combination से color बनता है
📌 Example:
<p style="color:rgb(0,0,255);">यह नीला रंग है</p>
Background Color देना
👉 पूरे page या किसी box का background बदल सकते हैं
📌 Example:
<body style="background-color:yellow;">
  <h1>Welcome to UICT</h1>
</body>
Important Points
color= text का रंगbackground-color= पीछे का रंग- HEX और RGB ज्यादा professional होते हैं
Mini Practice (Students के लिए)
👉 यह code खुद से बनाइए:
<h1 style="color:blue;">Hello</h1>
<p style="background-color:lightgray;">This is paragraph</p>
आसान भाषा में समझें
👉 Color = वेबसाइट को सुंदर बनाने का तरीका 🎨
2. Fonts in HTML (फॉन्ट का उपयोग)
Fonts का उपयोग text की style, size और design बदलने के लिए किया जाता है।
👉 इससे आपका webpage professional और attractive दिखता है।
🔹 1. Font Size (टेक्स्ट का साइज)
👉 टेक्स्ट को छोटा या बड़ा करने के लिए
📌 Example:
<p style="font-size:20px;">यह बड़ा टेक्स्ट है</p>
🔹 2. Font Family (टेक्स्ट का स्टाइल)
👉 टेक्स्ट का design बदलने के लिए
📌 Example:
<p style="font-family:Arial;">यह Arial font है</p>
👉 Common Fonts:
- Arial
- Times New Roman
- Verdana
🔹 3. Font Weight (Boldness)
👉 टेक्स्ट को मोटा (bold) करने के लिए
📌 Example:
<p style="font-weight:bold;">यह bold टेक्स्ट है</p>
🔹 4. Font Style (Italic)
👉 टेक्स्ट को तिरछा करने के लिए
📌 Example:
<p style="font-style:italic;">यह italic टेक्स्ट है</p>
🔷 Combined Example (Exam में important)
<p style="font-size:18px; font-family:Verdana; font-weight:bold;">
  Welcome to UICT
</p>
🔷 Important Points
font-size= साइजfont-family= स्टाइलfont-weight= मोटाईfont-style= तिरछा
🔷 Mini Practice
👉 यह code बनाइए:
<h2 style="font-family:Arial; color:blue;">
  Computer Class
</h2>
Module 6: Programming in C
C क्या है
C एक programming language है जिससे software बनते हैं।
Basic Program
Basic Program किसी भी programming language का सबसे सरल और पहला program होता है।
इसका उपयोग language की शुरुआत समझने के लिए किया जाता है।
#include<stdio.h>

int main() {
    printf("Hello World");
    return 0;
}
Data Types
Data Type का मतलब होता है कि variable में किस प्रकार का data (value) store होगा।
यानि:
- Number store करना है
- Decimal store करना है
- Character (letter) store करना है
यह सब Data Types तय करते हैं।
int a = 10;
float b = 5.5;
char c = 'A';
Operators
Operator ऐसे symbol होते हैं जिनका उपयोग हम calculation (गणना) या comparison (तुलना) करने के लिए करते हैं।
आसान भाषा में
Operator = गणित या तुलना करने का तरीका
जैसे:
- जोड़ (+)
- घटाना (-)
- बराबर (==)
Operators के प्रकार
1. Arithmetic Operators (गणित वाले)
+
-
*
/
%
if-else
if-else एक decision making statement है।
इसका उपयोग तब किया जाता है जब हमें condition के आधार पर अलग-अलग काम करना होता है।
if(a > b) {
   printf("A bada hai");
} else {
   printf("B bada hai");
}
Loop
Loop का मतलब होता है किसी काम को बार-बार दोहराना (repeat करना)।
आसान भाषा में
Loop = एक ही काम को कई बार करना
जैसे:
1 से 5 तक number print करना
for(int i=1; i<=5; i++) {
    printf("%d\n", i);
}
Array
Array एक ऐसा तरीका है जिसमें हम एक ही प्रकार (same type) के कई values को एक साथ store कर सकते हैं।
आसान भाषा में
Array = एक ही type के data को एक लाइन में रखना
जैसे:
5 students के marks को एक साथ रखना
यहाँ:
int= data typearr= array का नाम5= कितने elements हैं
int arr[5] = {10, 20, 30, 40, 50};String
String का मतलब होता है characters (अक्षरों) का समूह, यानी कई letters मिलकर बना हुआ word या sentence।
आसान भाषा में
String = text या शब्द
जैसे:
- “Hello”
- “Rocky”
- “Computer”
char name[] = "Rahul";
Example Program:
#include<stdio.h>
int main() {
char name[] = “Rocky”;
printf(“%s”, name);
return 0;
}
Pointer
Pointer एक ऐसा variable होता है जो किसी दूसरे variable का address (पता) store करता है।
आसान भाषा में
Pointer = address रखने वाला variable
जैसे:
अगर variable एक घर है, तो pointer उसका address है
Example
int a = 10;
int *p = &a;
समझिए
a = 10→ यह normal variable है&a→ a का address (memory location)*p→ pointer variable (address store करता है)
Important Symbols
&→ address निकालने के लिए*→ pointer बनाने और value access करने के लिए
पूरा Example Program
#include<stdio.h>int main() {
    int a = 10;
    int *p = &a;    printf("%d\n", a);   // value
    printf("%p\n", &a);  // address
    printf("%p\n", p);   // address
    printf("%d\n", *p);  // value using pointer    return 0;
}
Output समझ
a→ 10&a→ addressp→ address*p→ 10
आसान समझ
p→ address रखता है*p→ value देता है
Read More :Best Computer Certification Courses जो 2026 में दिलाएंगे शानदार नौकरी और हाई सैलरी
Read More: Html assignment